Acquire Dynamics
Follow this quick start guide to start using the app today.
For questions and support, contact acquiredynamics@gmail.com.


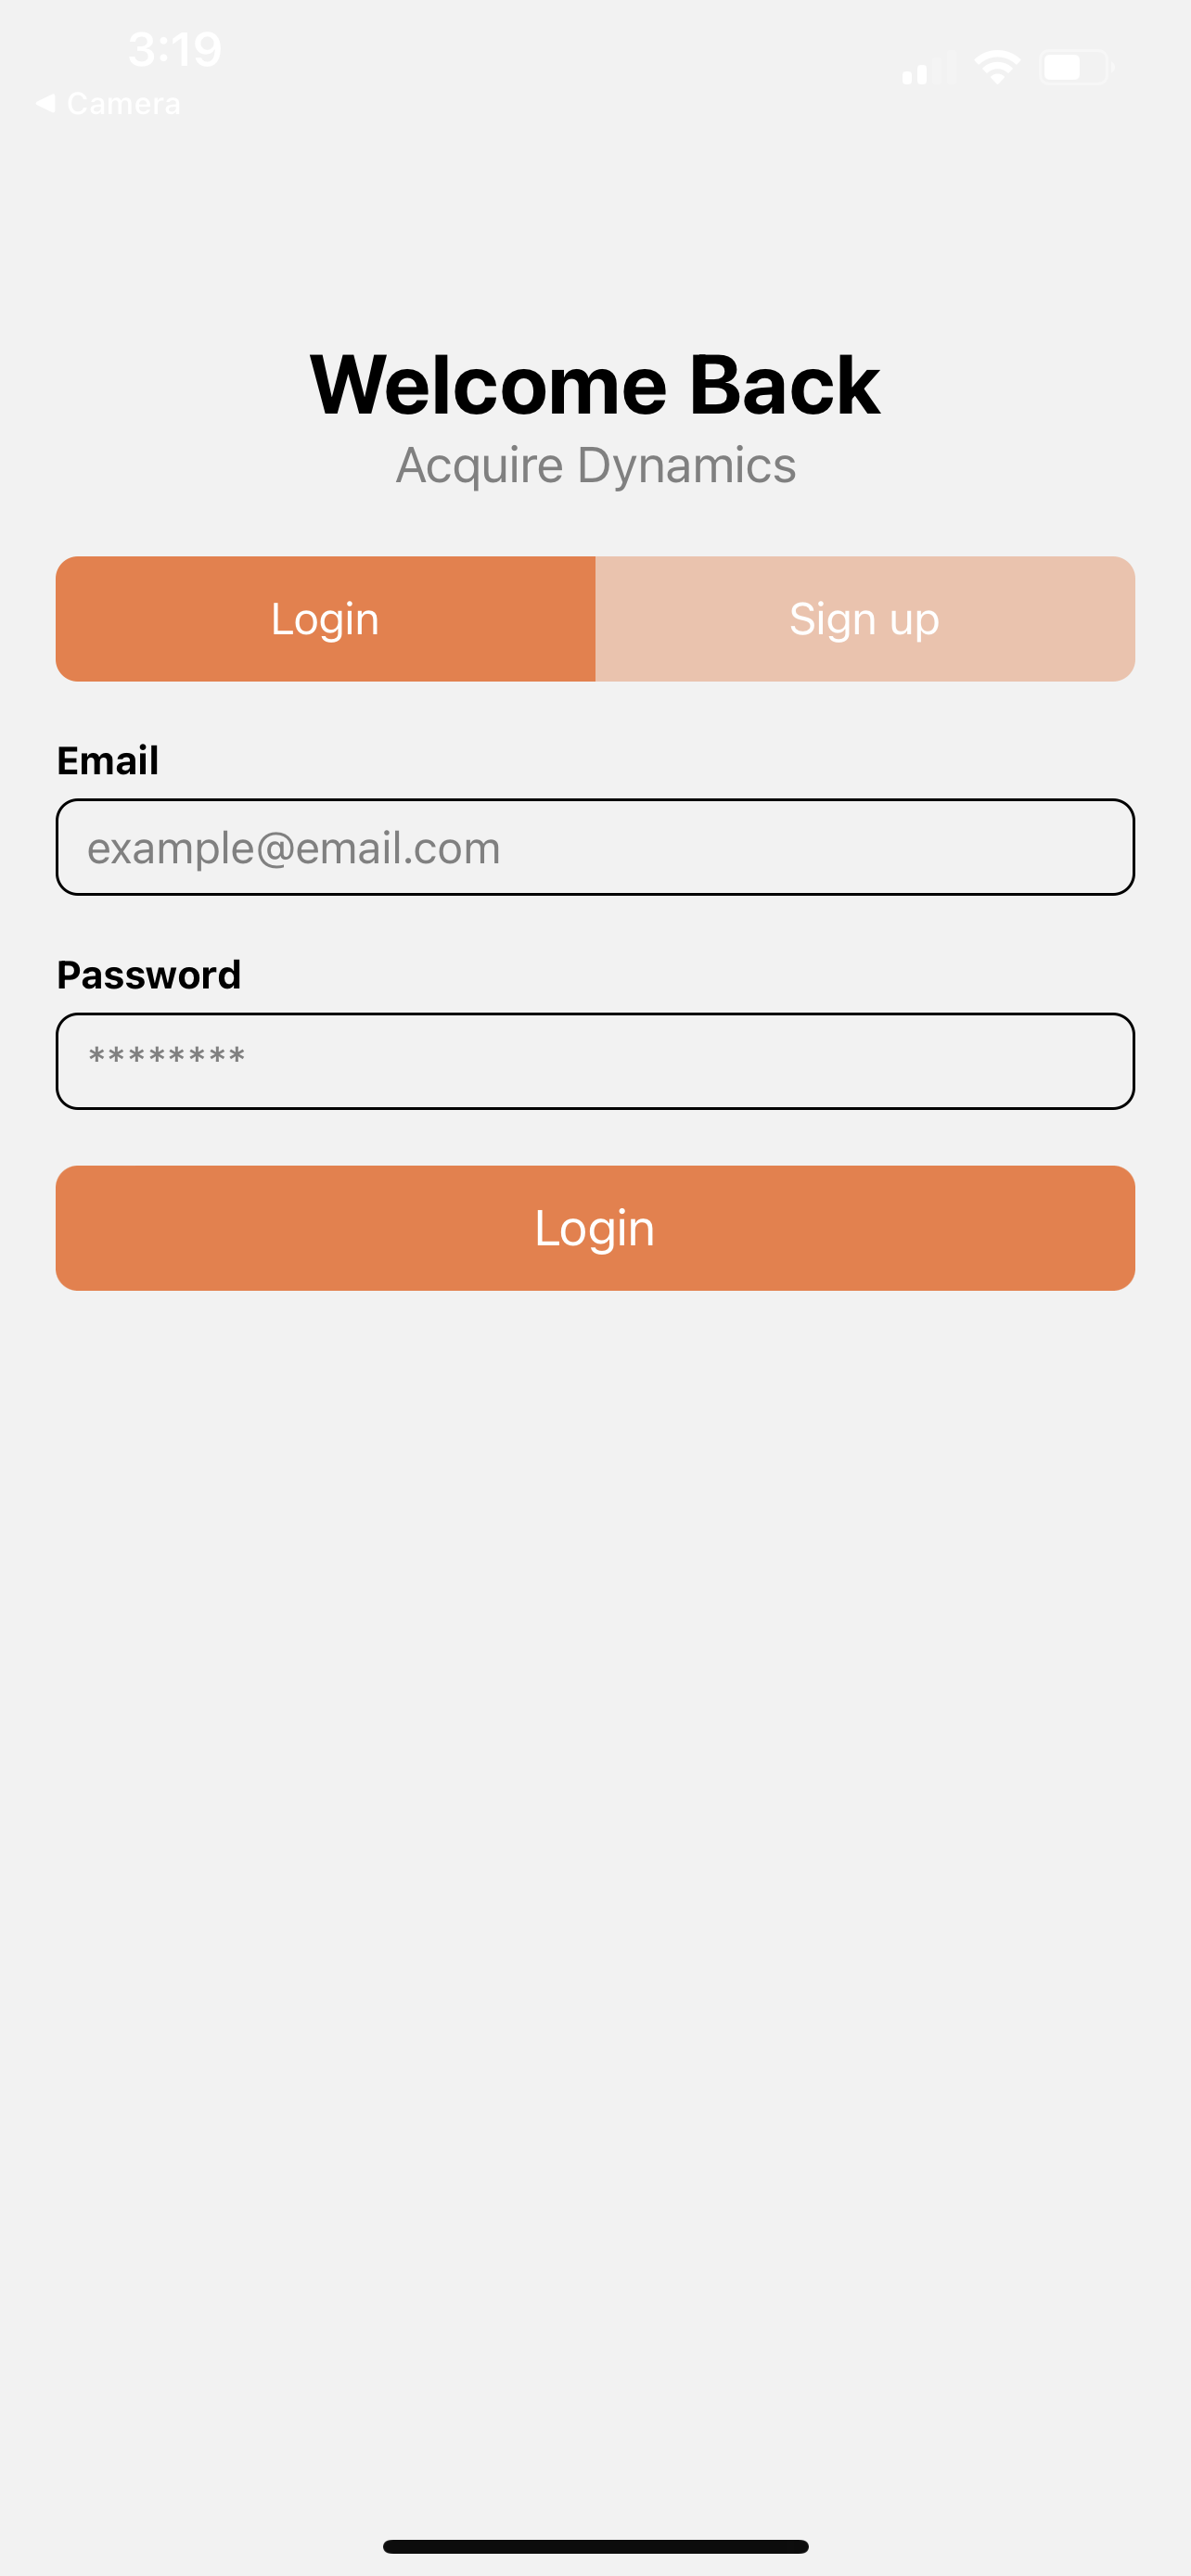
Sign up!
Once you have the app installed, open it to view the Login screen. If this is your first time using the app, Sign Up and create an account! If you are coming back, enter your username and password to log in.


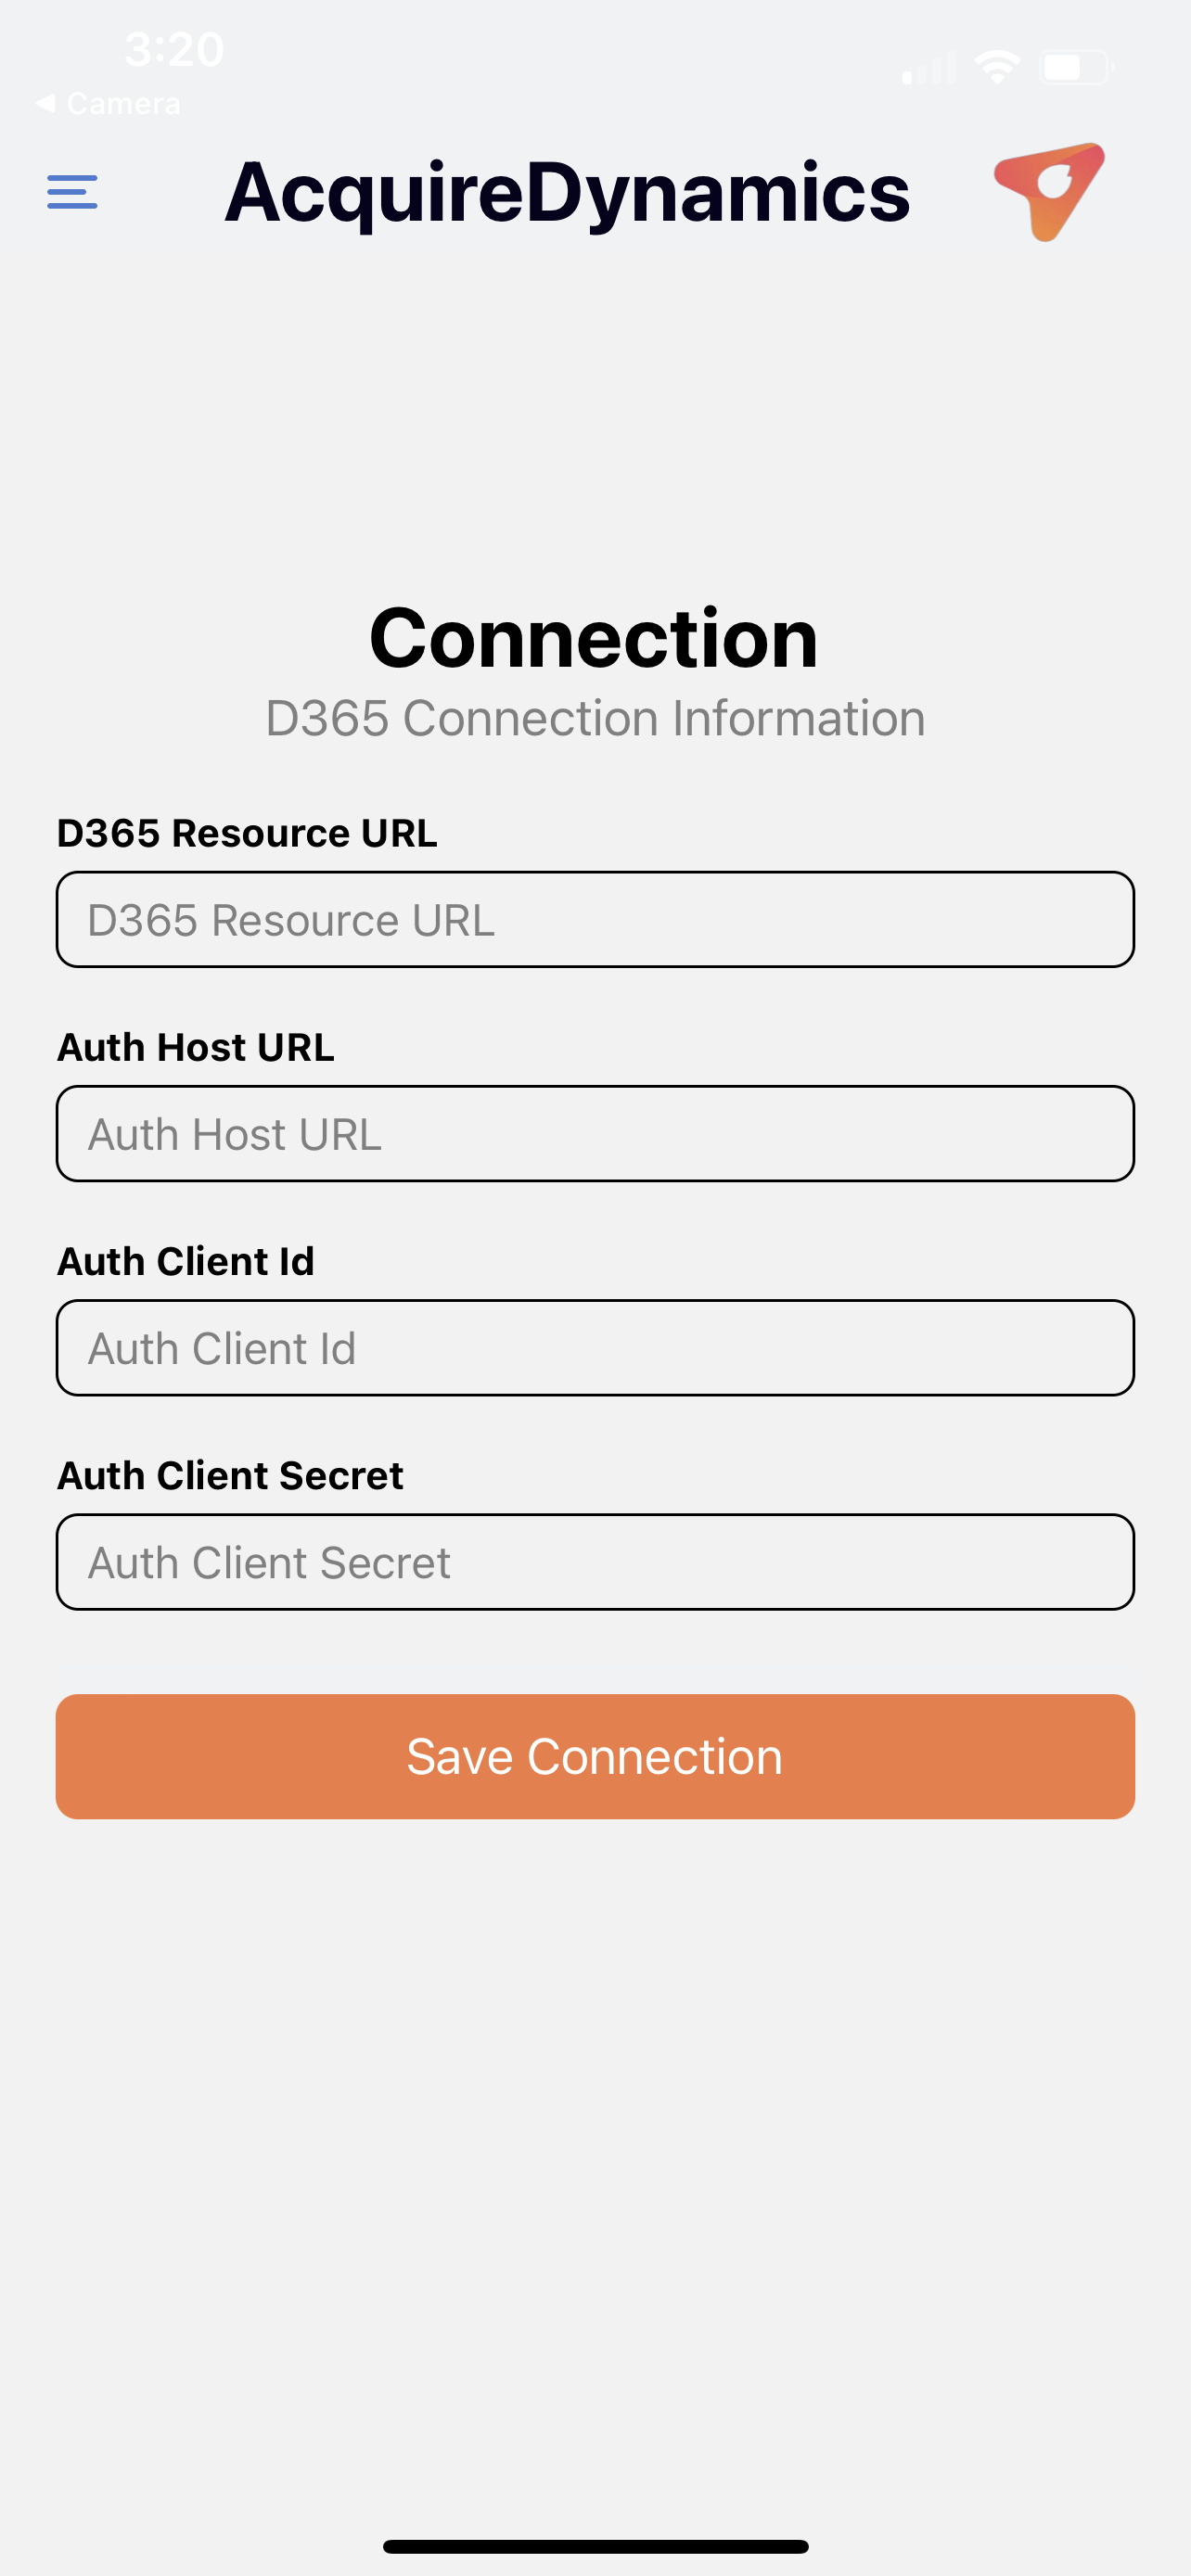
Connect to D365
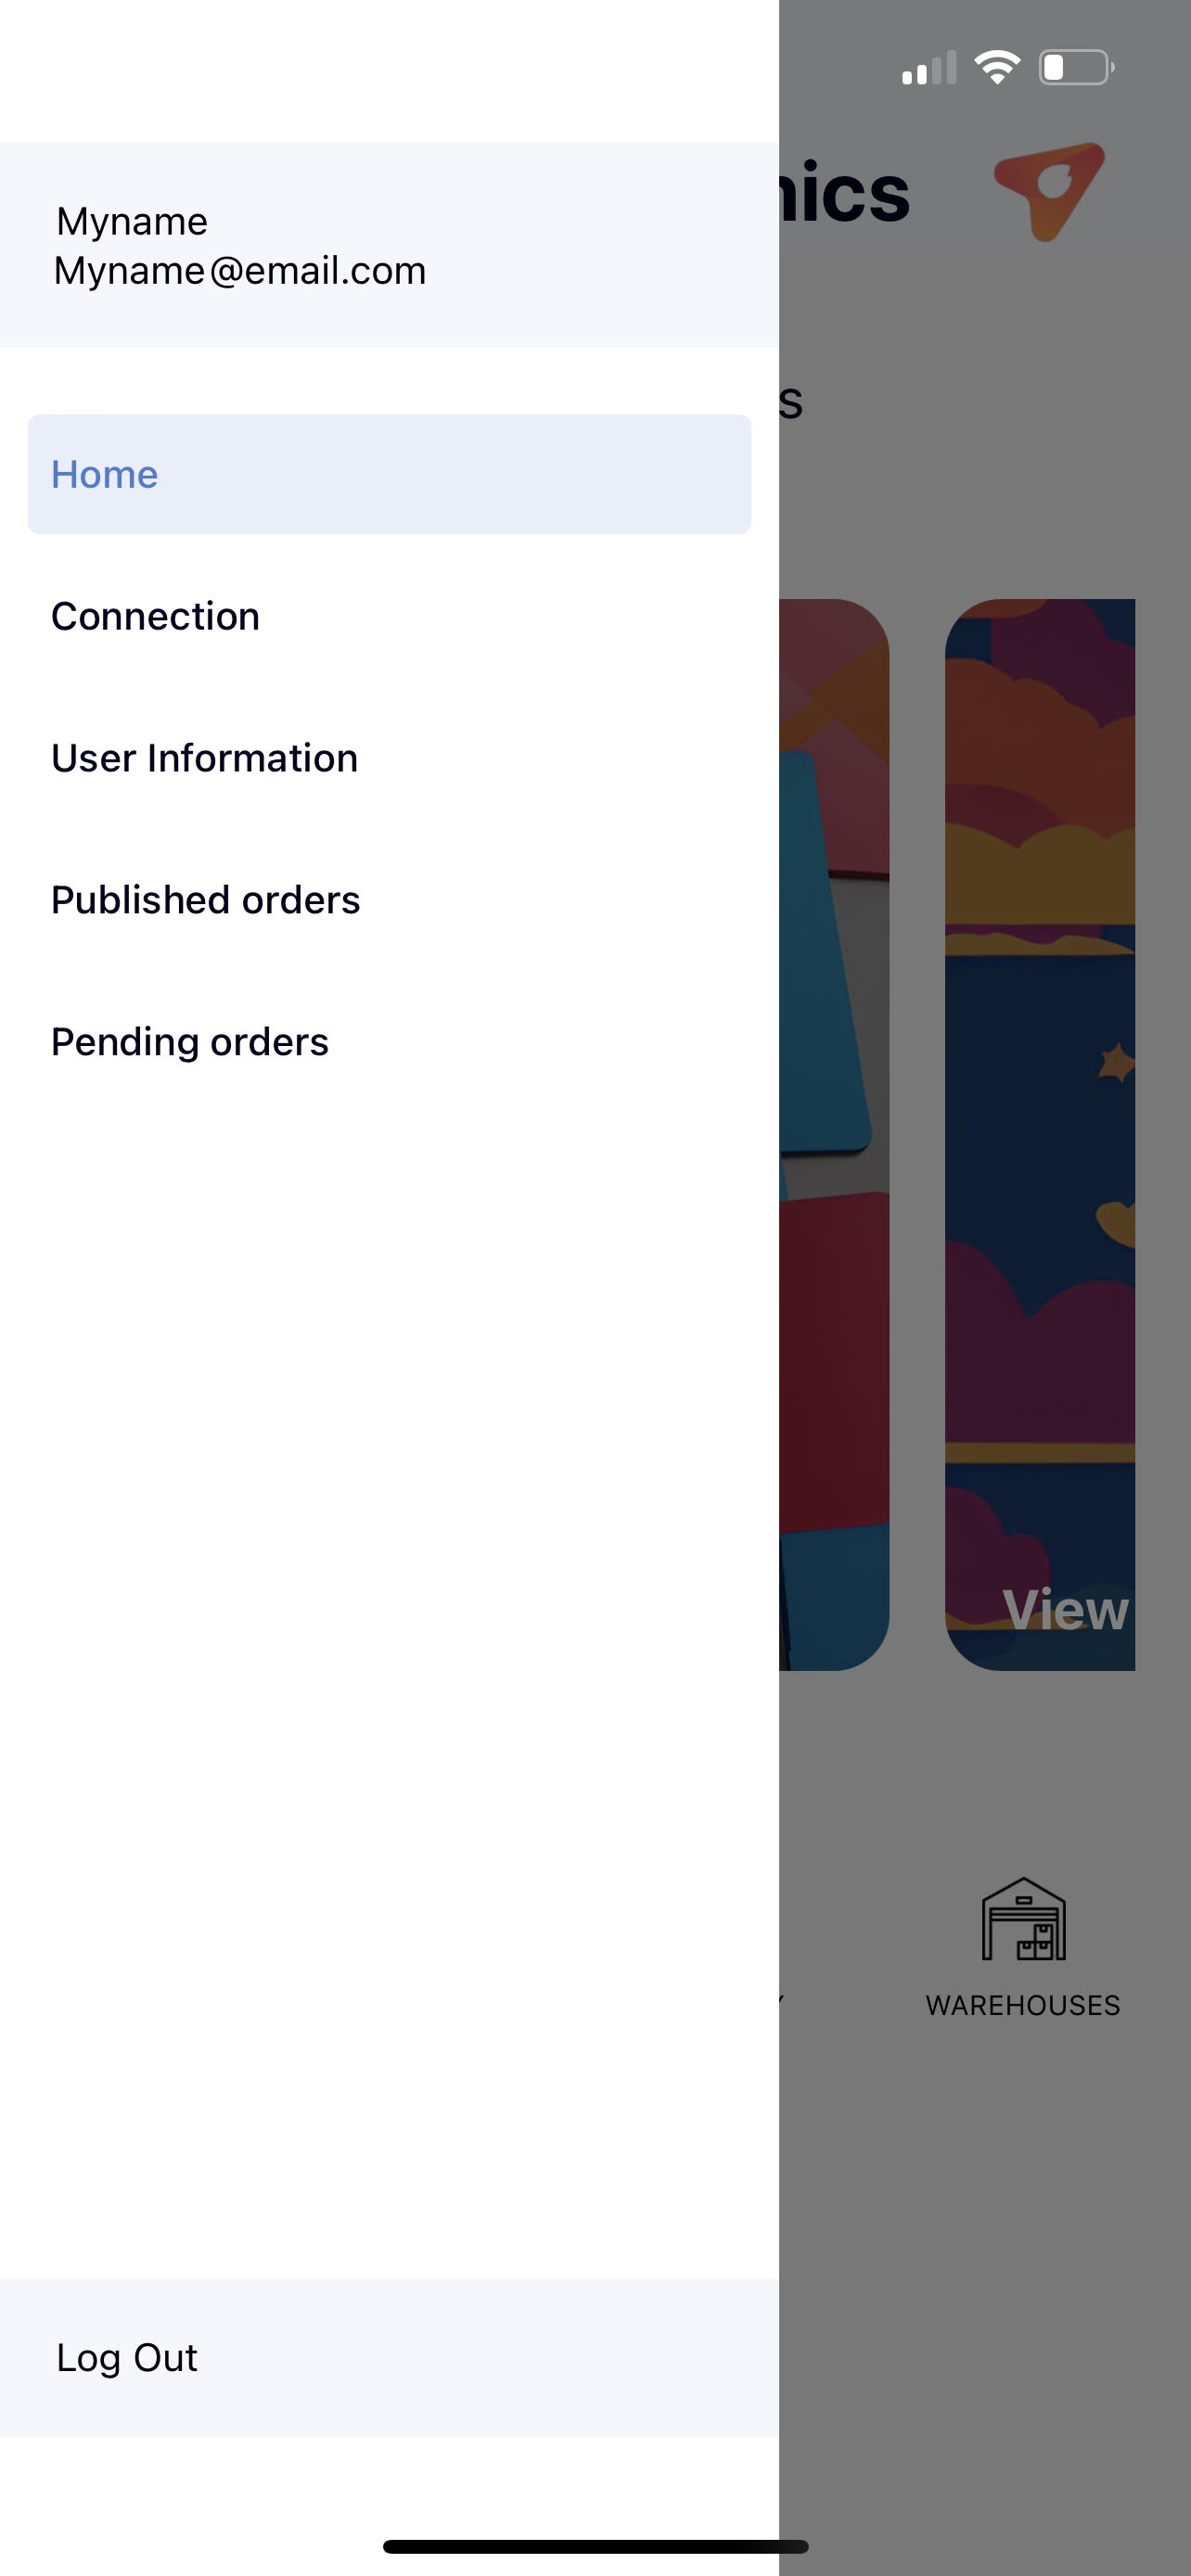
Before you use the application, you need to connect to your instance of D365. To do this, open the menu in the upper left hand corner and select Connection
Now we need to enter the following values to establish our connection to D365.
D365 Resource URL:
- Example value: https://your.company.dynamics.com
- Description: This is the URL used to access your instance of D365 from the browser.
Authentication Host URL:
- Example value: https://login.microsoftonline.com/ yourcompanytenant.com/oauth2/token
- Description: This is the URL used to authenticate to your instance of D365.
- The base URL will likely remain the same, however your tenant will need to be specified to reference your Azure AD ClientId and ClientSecret
- If you do not have an Azure AD set up, follow the steps provided here: Azure AD Setup
Authentication Client Id:
- Example value: 01234567-abcd-abcd-abcd-abcdef012345
- Description: This is the ClientId value obtained from the setup in the previous step for Authentication Host URL.
Authentication Host URL:
- Example value: abc7Q~defghijklmnopqrstuvwxyz-_.~0123
- Description: This is the ClientSecret value obtained from the setup in the previous step for Authentication Host URL.


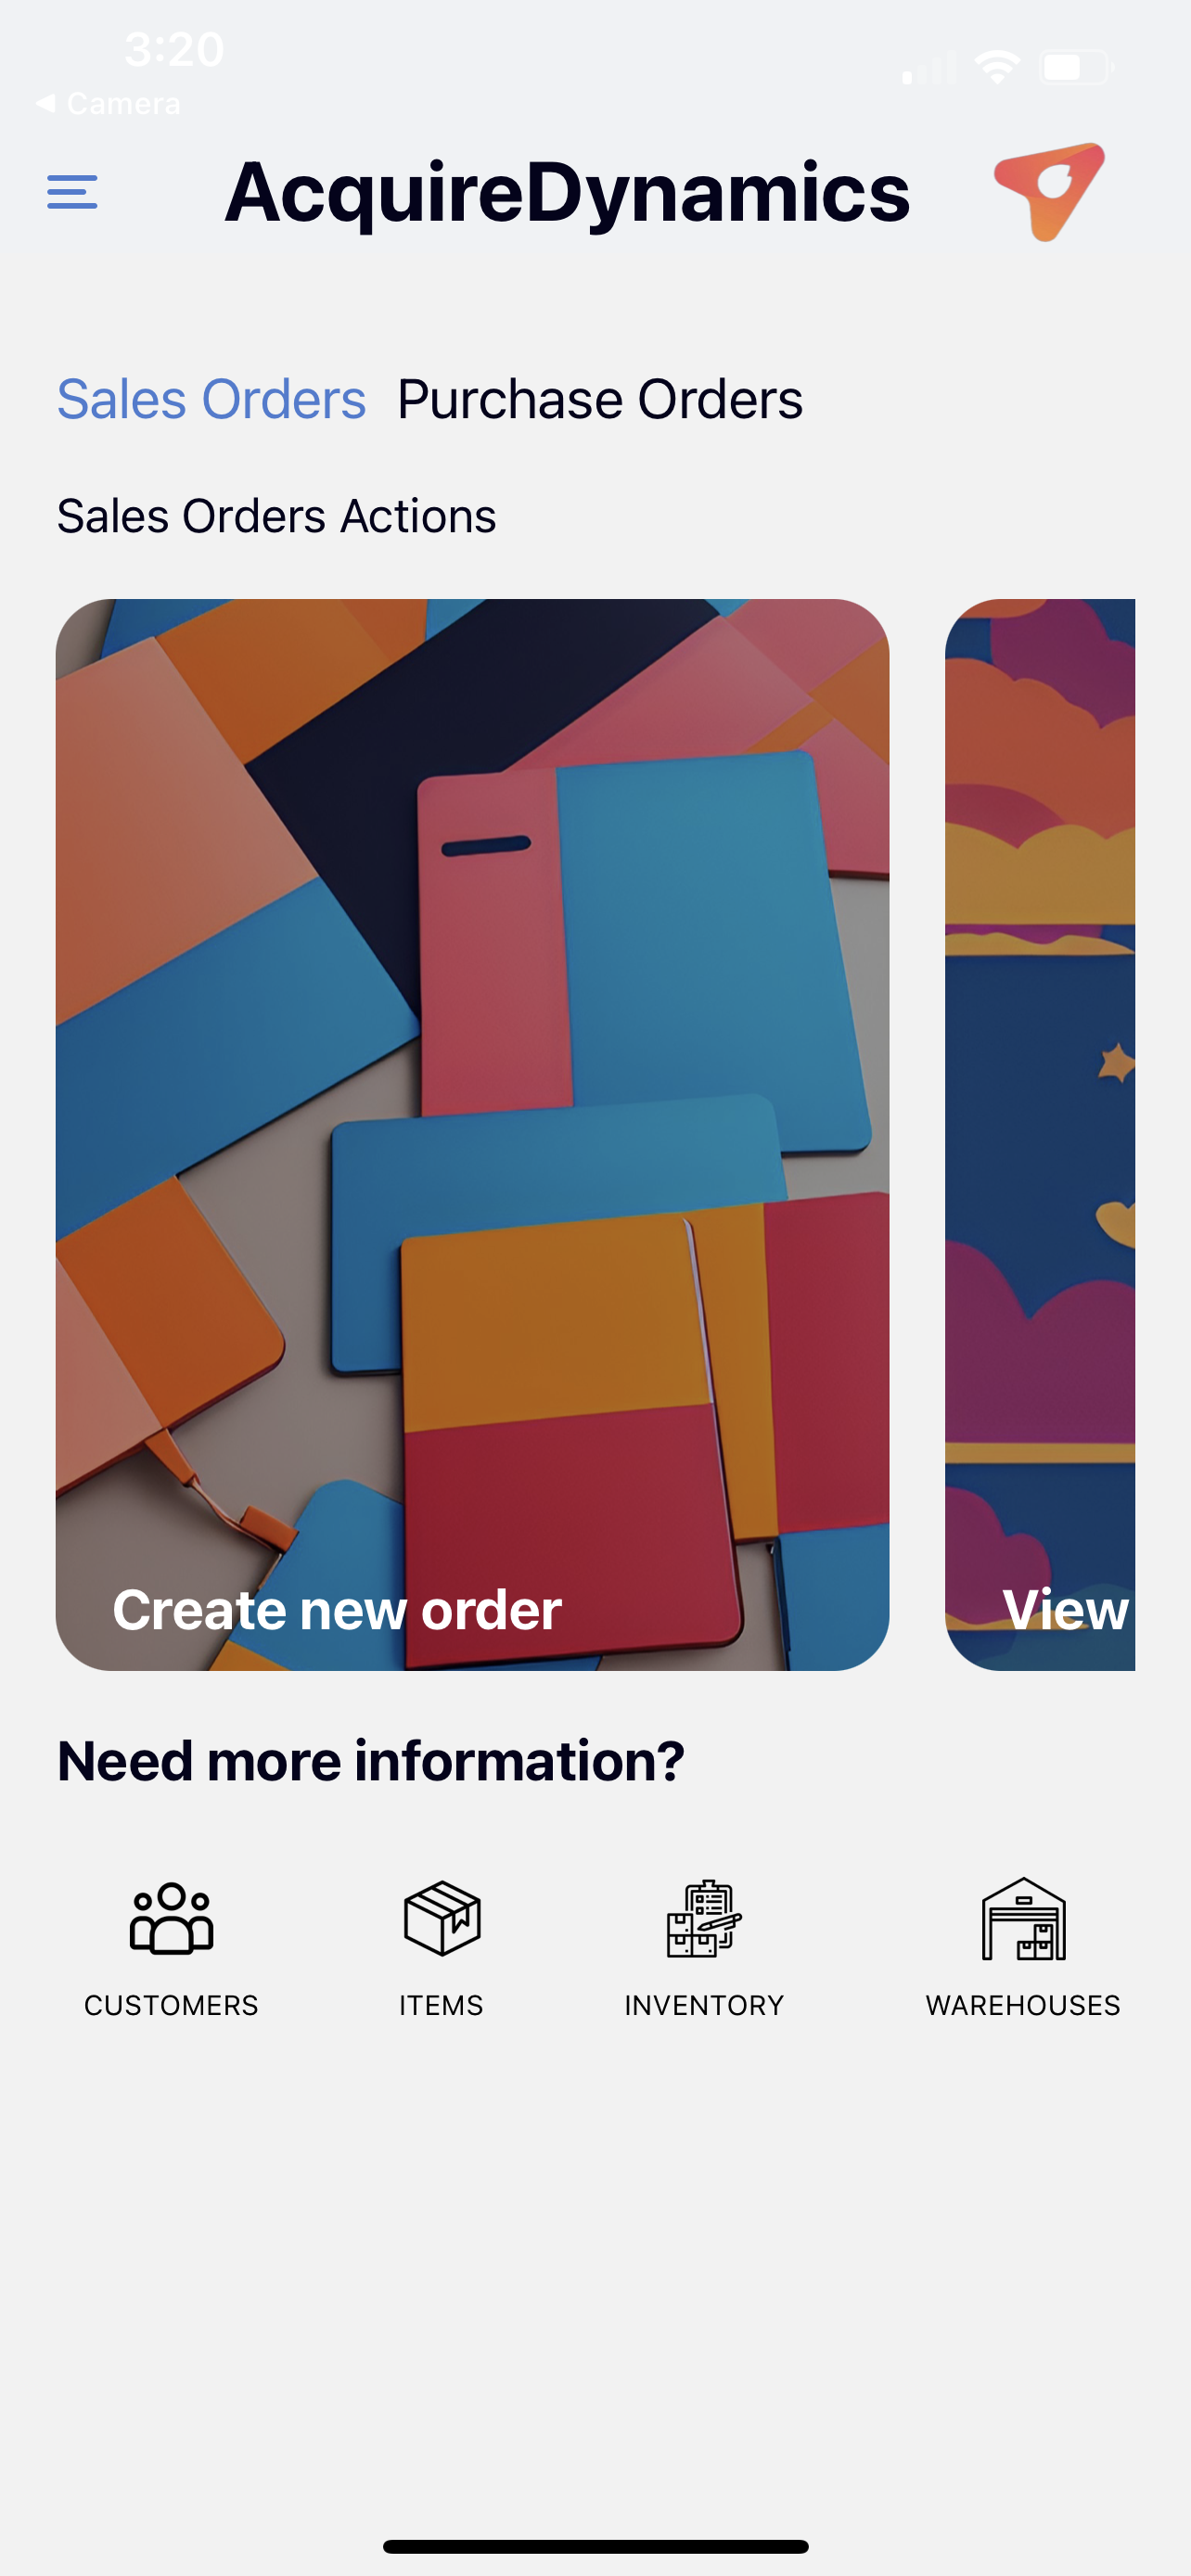
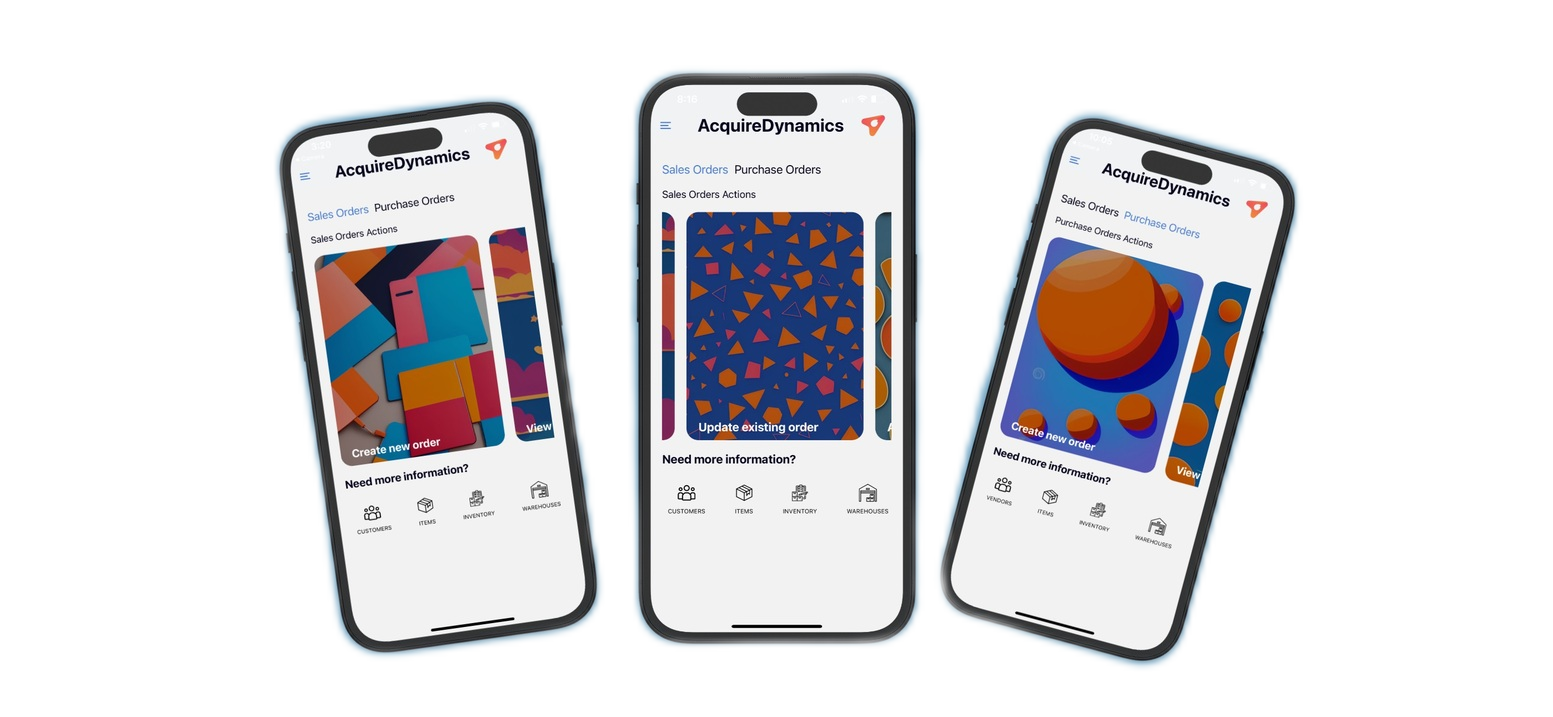
Hit the ground running
After enabling your connection, return to the Home screen via the navigation menu. Now you can access one of the tiles to create, view, update and delete your purchase and sales orders! Watch video demos of whats possible!